June 13, 2021

Installing New Butcher Block Countertops

Hello, and welcome back to my blog.

I've always loved the natural look and warmth of butcher block countertops.  So when our middle son offered to help my husband and I replace our old laminate countertops with butcher block this Spring, we couldn't refuse!  He also helped us install a new single-basin stainless steel sink, faucet, and wood backsplash.  He was a big help to us that week, and we couldn't have done it without him, or our youngest son, who hauled the heavy 10 foot counters by skiff last winter, from the City dock to our house on the beach.

We ordered the unfinished countertops online from Home Depot.  The instructions that came with the countertops advised sealing them on both sides with 4 coats of butcher block oil, or other food-safe sealant, before installing.  We used Howard Butcher Block Conditioner for this step.  We thought the butcher block conditioner (a mixture of mineral oil, beeswax, and carnauba wax), would darken up the maple wood.  It did, but only slightly . . .


They were pretty, but too light.  We really wanted darker countertops that would blend in with the existing wood tones we had in our kitchen.  So, we decided to go ahead and finish the other elements of the project, including cutting the hole for the sink while we had our son's help, and worry about the counter color later.  At least they were sealed, and now we could use them.

 So after a few weeks of online research, my husband and I decided to add food-safe Real Milk Paint Dark Tung Oil to the Howard Butcher Block Conditioner to darken the countertops.  We mixed a ratio of 25% dark tung oil to 75% butcher block conditioner.  Then we applied 3 coats of this mixture onto the countertops, letting each coat soak in, then buffing off the excess, with a soft, dry cloth . . .


Much better!  They're still light, but the warmer tones of the wood grain have been brought out, blending in better with our heart pine wood floors, oak cabinets, and adjacent livingroom . . .


 Water and liquid beads up on the matte-finish surface, which has made dish soap and water clean-up simple.  For maintenance, we plan on wiping our butcher block conditioner mixture onto the countertops every month or so, to keep the wood protected, and from drying out.

Let me know if you have any comments or questions.  I'd love to hear from you!

Kim

April 2, 2021

Vegan Split Pea Soup

It's Springtime, but still cold and snowing in Alaska.  And the perfect day to make homemade soup and bread!

I've been making this simple split pea soup recipe for many years after finding it in an old book by Dr. Neal Barnard, when I first became a vegetarian.  Dr. Barnard is a vegan doctor, and founding president of the Physicians Committee for Responsible Medicine, or PCRM.  If you're interested in learning more about a healthy plant-based diet; the PCRM website, and Dr. Barnard's books are very helpful.


Vegan Split Pea Soup

Serves 4


Ingredients:

2 cups dry green split peas

7 cups water

1 cup chopped carrots

1 cup chopped onions

3 garlic cloves, minced

1 tsp. salt

1/4 tsp. pepper


Instructions:

Rinse split peas, then place in large pot with remaining ingredients.  Bring to simmer, then cover loosely, and cook on low heat until peas are tender; about 3-4 hours.  Add 1/2-1 cup more water, if consistency seems too thick.

~~~

I also baked some vegan Maple Chocolate Chip Cookies.

Yum!

Have a warm and cozy Spring,

Kim


March 22, 2021

Dutch Oven Bread


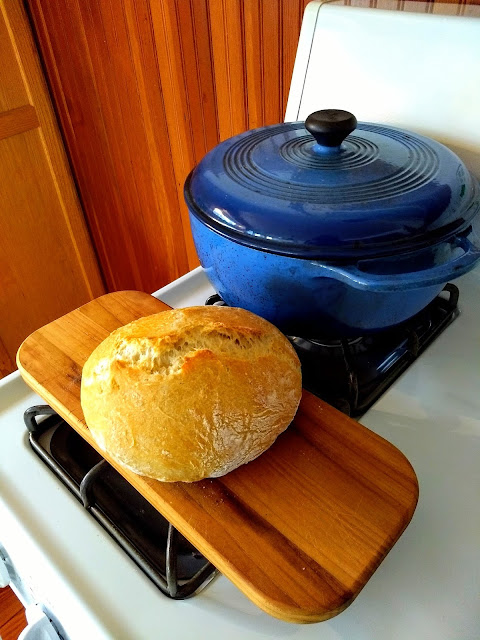
I love this no-knead, artisan-style bread recipe that's soft and chewy on the inside, but crusty on the outside, with amazing flavor in every bite.  Baked in a cast-iron Dutch oven, it's also a good, simple recipe to start with if you've never made homemade bread before.

Enjoy!


Dutch Oven Bread

Makes 1 Loaf


Ingredients:

3 cups unbleached, all-purpose flour

1 tsp. active dry yeast

1 tsp. salt

1 1/2 cups warm water


Instructions:

  1. In a large mixing bowl, mix together flour, salt, and yeast.
  2. Add warm water and stir until a shaggy mixture forms.  Mixture will be lose and sticky.  This is what you want.
  3. Cover bowl and set aside for 12-18 hours (up to 24).  Overnight works great.
  4. Preheat oven to 450 degrees.  Place a cast-iron Dutch oven with lid in the oven and heat the pot for 30 minutes.  Meanwhile, place risen dough onto a floured surface and shape into a round loaf.
  5. Remove hot pot from oven and place dough in pot.  Cover and return to oven for 30 minutes.  Then remove lid and bake bread an additional 10-15 minutes.
  6. Carefully remove bread from oven and from pot and place on a cooling rack.


Recipe adapted from Alaska from Scratch


February 15, 2021

Buffalo Tofu


Buffalo Tofu is a spicy vegan protein dish that can be grilled or baked, and easily accompanies many side dishes.  My husband and I might have it one night with brown rice and grilled veggies, or broiled asparagus; and the next night, the leftover tofu reheated, and tossed into a salad.


Tonight, I grilled and diced the tofu, then tossed it into a roasted butternut squash, kale, onion, and red cabbage salad, then added a little vinagarette dressing and roasted pumpkin seeds.  Yum!

I've broken this recipe out into four sections:
Ingredients, Marinade Instructions, Baking Tofu, and Grilling Tofu.  There's also a note about pressing tofu at the bottom of the page.  It might look a little complicated, but it's not.  It's really a pretty simple recipe once you decide whether you want to grill, or bake the tofu.

 Let me know in the comments if you have any questions, and enjoy!


Buffalo Tofu

Serves 3-4

Ingredients:

1 (14-15 ounce) block extra-firm tofu, pressed (see note below)

1/3 cup Frank's Red Hot Sauce

3 Tbsp vegan butter, melted


Marinade Instructions:

  1. Whisk together hot sauce and melted vegan butter.
  2. Slice pressed tofu into 4 steaks.
  3. Marinate tofu steaks in hot sauce marinade for at least one hour in refrigerator, flipping occasionally.  If baking, marinate the tofu directly in your baking dish, for simplicity.


Baking Tofu:

  1. Preheat oven to 400 degrees.
  2. Bake tofu steaks in marinade for 30-35 minutes, flipping each one midway through baking.
  3. The tofu is done when the marinade has been absorbed, and the tofu is brown and sizzling.


Grilling Tofu:

  1. Oil grill and sear marinated tofu steaks over direct heat for 5-8 minutes on each side.  It's best to use a thin stainless steel spatula to flip tofu.
  2. The tofu steaks will be done when they are firm, and show char marks.


Kitchen Note:  Tofu needs to be drained and pressed before using.  Open the tofu and drain off liquid.  Then press the tofu by placing a paper towel on a dinner-size plate, then place tofu on top of that paper towel.  Top the tofu with another paper towel, then weight the tofu down with another smaller plate.  Refrigerate until ready to use.

Pressing tofu looks something like this.

Recipe adapted from VBQ The Ultimate Vegan Barbecue Cookbook and the Show Up For Salad Cookbook.


January 11, 2021

Looking Back, and Looking Forward

Hello, and a very happy new year to you!  So much has happened since I was here last summer.

In August, our middle son proposed to his darling girlfriend!  We're so happy for them, and looking forward to a lovely little wedding in Alaska, next September.


In October, my husband and I took a road trip to Minnesota to see our one-year old baby granddaughter, and celebrate our eldest son's birthday.  We had such a good time!  I made a vegan chocolate birthday cake that really didn't taste vegan . . . if you know what I mean. ☺  It was delicious, and the recipe can be found here.

~~~

Let food be thy medicine, and medicine be thy food.

~ Hippocrates

 Last year I gradually strayed away from a healthy plant-based vegan diet, by occasionally adding in both cheese and fish.  But in December, I watched an excellent British documentary called Living Vegan that inspired me to get back on track and restart my vegan journey again in 2021.

 I'm hoping to be here a little more often this year too.

Until then, 

Peace and Blessings,

Kim

July 23, 2020

Summer Days, and Kelp Salsa

It's so good to be back home in Alaska, surrounded by the beauty and peace of nature.


Last fall, when my husband and I closed up our home and went to Nevada for the winter, I froze my wild berries and sourdough starter.  Then when we returned this year, we had plenty of berries for breakfast smoothies and our favorite berry desserts, and sourdough starter for fresh bread.  I reactivate my frozen sourdough starter by feeding the thawed starter with a 1/2 cup of warm water, and 1 cup of flour.


Earlier this summer, our youngest son and his lovely girlfriend visited us for a week.  And even though we were all under coronavirus travel quarantine restrictions, we had a great time together, and it was such a treat to have them here!


One of the projects we all worked on together was harvesting kelp from our skiff, and canning kelp salsa.  Kelp Salsa is a unique summertime recipe, and a favorite of Southeast Alaska.  My recipe is adapted from the book; Common Edible Seaweeds in the Gulf of Alaska, by Dolly Garza.


Kelp Salsa
Makes about 13-14 pints

Ingredients:

8 cups bull kelp, chopped
2 green peppers, chopped
1 yellow onion, chopped
9 ribs celery, chopped
1 bunch cilantro, chopped
15 cloves garlic, chopped
2/28oz. cans Diced Tomatoes
2/15oz. cans Tomato Sauce
6oz. can Tomato Paste
6oz. can Chopped Jalapenos
2 cups vinegar
6 tsp. cumin
1 tsp. salt
5oz. btl. Habanero Pepper Sauce (optional)

Helpful Tools:

Instructions:

  1. Combine all ingredients together in a large pot.
  2. Bring to a boil, then simmer for one to two hours.
  3. Spoon into half-pint or pint sterilized jars, leaving 1/2" headroom.
  4. Screw on lids, and boil in hot water bath for 20 minutes.
  5. Remove jars from hot water, and cool for 12-24 hours.
  6. Check lids to make sure they are sealed.


Kitchen/Harvesting Note:  Avoid kelp with white splotches, they are past their prime; and do not collect floating kelp.

~~~


His house was perfect, whether you liked food, or sleep, or work, or story-telling, or singing, or just sitting and thinking, best, or a pleasant mixture of them all.
~ J.R.R. Tolkien
The Hobbit


June 24, 2020

Baked Red Potatoes with Garden Chives


Earlier this month, my husband and I finally returned home to Alaska, after a longer than usual winter and spring in the Desert.
Our little cottage had survived the long, cold Alaskan winter without a single problem; and the garden, although overgrown and wild, was green and thriving.  Berries, rhubarb, garlic, lettuce, chives, lilacs, and roses were all blooming beautifully, with a little help from Mother Nature.

Chives

Baked red potatoes are always a great veggie side dish any time of the year; but in the springtime, with added chives fresh from the garden, they're especially delicious, and simple to make too.


Simply chop red potatoes and chives.


Toss together with avocado oil, a generous sprinkling of garlic powder, and salt.

Spread potatoes on a sheet pan, and bake in a 350 degree oven until brown and crispy, about 30-40 minutes.  Turn potatoes over midway through cooking.

Enjoy and have a beautiful summer!